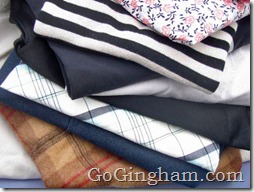
Remember our trip to “The Bins” and the stack of clothing I bought for $18.20? My family loved everything but several items needed altering. Altering clothing, especially jeans, is easy and takes very little time. The jeans, which were brand new Gap women’s jeans, were too wide at the leg for the wearer, who wishes to remain nameless. This project only took about 15 minutes and the jeans probably cost about $1.00. If you’ve ever considered sewing your own jeans, this is an excellent alternative.
These before and after pictures really show the idea of tapering jeans and making them smaller.

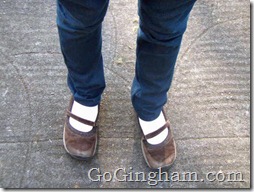
Making jeans smaller is easy by following these steps.
1. Wash and dry jeans. This takes any shrinkage of the item out. Turn pants inside out. Lay a pair of jeans that do fit on top of jeans to be altered. This will help give you an idea of what will be eliminated.

2. Line up seams. Inside seams to inside seams, outside to outside seams. You’ll want to take the jeans in a bit on each side of the pant leg. Each of the pant leg seams will be altered a small amount. This will make the pant legs straighter and look better when you’re done.
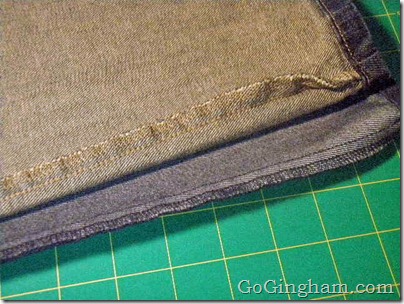
3. Pin jeans flat. Make sure the fabric is smooth through both layers. Mark with a pin where to stop altering or tapering the leg. Again, make marks from pair of jeans that do fit.

4. Place ruler and mark. Use a pencil to make a line of where your machine will be stitching. Pencil marks won’t show after you’re done. A serger works really well here as it cuts and hems in same step. A regular sewing machine will also work. With a regular sewing machine, sew seam first and then trim edges.

5. Sew on marks. Ease hem into the original seam of jeans. As you can see below, the hem matches up with the jeans seam.

6. Stitch seam and test. Here is what was cut off one side of the jeans after stitching the seam. This is a good time to have your model try on the jeans to see if they fit correctly. Remember, you can always take more off but you can’t add fabric back to the pants.
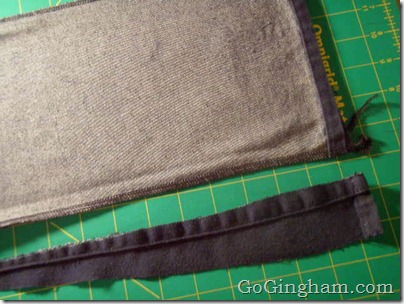
6. The finished product. Reinforce your stitches at bottom and top of pants. Be sure and trim any stray threads.
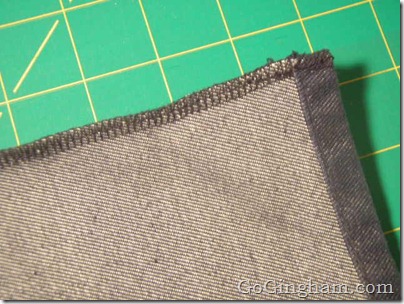
7. All finished!
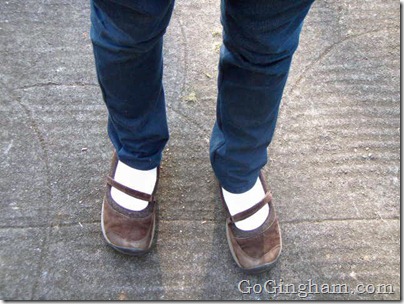
With pants, even if the project is a total failure, you can always make them into shorts. My daughter buys all of her clothes so she was thrilled with the result here. Once these jeans are too short, we’ll make them into shorts. Altering clothing is simple, but practicing is a good idea. Altering kid’s clothing before they have strong opinions about what they will and won’t wear is a good place to start. You can also practice on jeans you wear for painting or gardening. You can do it – Go Gingham!
What have you altered lately? Do you have any suggestions to this tutorial? Are you eager to give it a try?
Go Gingham related links:
Thanksgiving table-cloth made for our dining room table
Matching napkins for the table-cloth – made from an old skirt
How to take apart a skirt – use your seam ripper on this project!
Sew your own homemade lunch sack
How to sew a Harry Potter cape complete with wand pocket
A little wine cozy sewn from an arm of old dress shirt – that was turned into a paint shirt!
This began as a joke but it’s super cute: wine bottle slipcover from an old dress shirt
A tray table with a slipcover – because tables need slipcovers, too
Your tutorial looks great and covers the bases, Sara. I did a similar thing with an XXL long sleeve t-shirt and “shrunk” it down to a medium. Turned out nicely, even though a serger would have been nice. 😉
I also just added a hoodie-style two-handed pocket to the front of a fleece pull over. I added the pocket to cover a couple of stains I had gotten on it. I’ve also added fabric to the bottom of pants to make them longer, turned pillowcases into sleeveless tops, and made skirts out of table cloths and bed linens. I think making and wearing something original is a lot more fun than buying off the rack.
LikeLike
A serger is really nice for handling the 2 steps – cutting and finishing in one. For sewing clothing, it really finishes the inside without any bulk. I love your additions and changes to your wardrobe! Reminds of a holiday table cover I lined with a pair of velvet pants. Can you say wide leg??? Thanks for the comment, Kristin.
LikeLike
Wow, you are amazing! I love to sew, but I’ve only made clothes where I start with a store-bought pattern and follow the instructions. My sister gave me a bunch of dress pants that are too long for me, and I’m sure I can hem them myself, but I’ve been afraid to try. Any tips?
LikeLike
Hi Sam! On the pants, turn them inside-out and look to see how the pants were hemmed. This will give you an idea of how yours should be changed by shortening. I suggest starting on your least favorite pair (practice your technique) and see how it goes. The only hemming I don’t like to do are pants with cuffs. Mine never turn out as well as our dry cleaner’s cuffed hems down the street! Thanks for the comment.
PS I love the header image on your site…
LikeLike
Just found your website on Facebook. Many great ideas. I remember taking my boyfriends jeans and making them skinny jeans. I loved them. He didn’t love it when he got his leg stuck in them. I wish I had this little lesson back then. Mine were always a little different on each leg.
LikeLike
Hi Barbara,
So glad you found Go Gingham! Thanks for leaving a comment.
LikeLike