 With camping season upon us, I thought I’d share with you how my camp cooking supplies are organized. My goal while camping is the same in my kitchen – healthy food that tastes good, minimal packaging, and keeping waste to a minimum. In this case, waste not only with food but also keeping the amount of trash we generate while camping to a minimum.
Yes, I know it is so much easier to just purchase paper plates, plastic cups, and plastic utensils – then toss them all. However, with metal items you can use them again and again, year after year. It takes very little time to warm a pot of water (on your camp stove, of course) and wash your dishes at the campsite. The saving of resources – both money and the environment – are worth the extra effort.
Most of the items in our camp cooking box have been purchased used. This is an excellent way to outfit your camp cooking supplies, too. With 4 people in our family, here’s what we have (take a look below). This is a proven method – we’ve camped for 3 weeks straight – so I know what I’m talking about here!
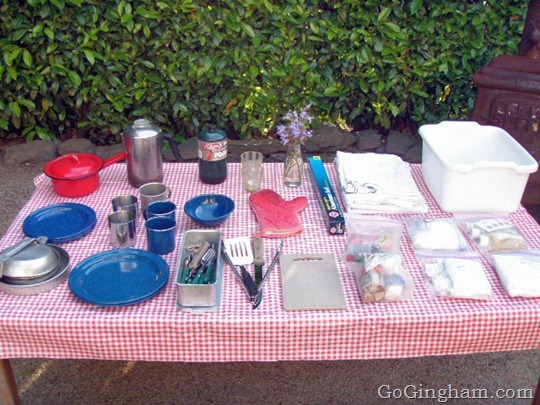
Camp Cooking Supplies
1. Tub for washing dishes. When not in use, you can also pack your items into this. This tub can also double for other uses as well.
2. Dish towels, for drying dishes. These can hang from a tree or your steering wheel to dry out overnight. I have 3 towels.
3. Coffee pot. Ours is a second-hand store purchase that requires no filters (or according to my husband – cleaning!). We just rinse it and let it air dry.
4. Pot with lid. Boiling water, cooking pasta, warming beans. One pot does it all. My little red pot is 2 quart size.
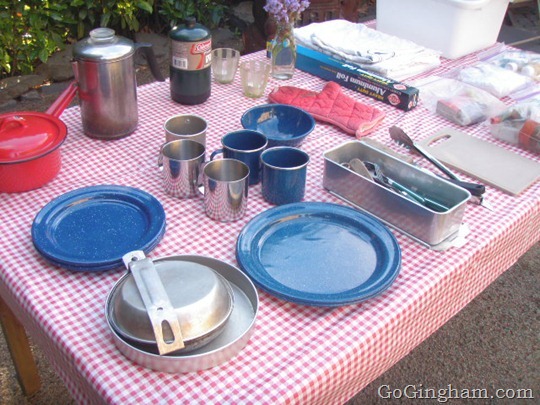
5. Four each (one for each person in your family) medium size plates. Large size plates for each person take up too much room and the medium size is plenty big.
6. Two each large size dinner plates. Sometimes you need a spot for your hot food to go and these plates also double as serving platters. And, if you have guests at the campsite, you’re set.
7. Four each metal cups (one for each person in your family). Serving beans, milk, coffee, wine, or oatmeal? Each person gets their own and they can clean it, too. It can even be used for teeth brushing. (I keep a spare one on hand just in case.)
8. Bowl. One. I thought we needed more of these but it turns out the metal cups work out fine. When cooking eggs or a batter, this is nice to have.
9. Cake tin. This does everything. It can double as a frying pan. It’s an extra lid. It can go on the grate, over the fire.
10. Back-pack, aluminum fry pan. This is what we cook popcorn in, over the fire. Also for frying eggs, bacon, pancakes etc. Again, this is an item you can cook anything in and it folds up quite nicely. Second-hand stores always have these.
11. Cutting board. Small. You’ll need to chop your veggies or filet the fish you catch from the lake.
12. Spatula, tongs, and large knife. These are the only utensils really needed. A large spoon borrowed from the eating utensils can also be used for serving or stirring.
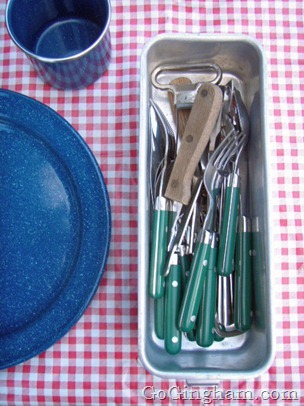
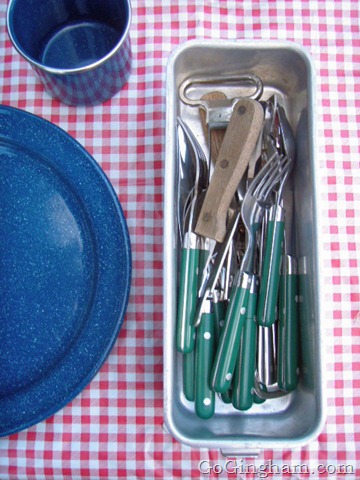
12. Eating utensils, pairing knife, can opener, and bottle opener. I found this clever holder in the basement at an estate sale. It has a cover that slides onto the top of it.
13. Hot pad. Don’t forget one of these. Cooking over a camp fire is tricky enough without any protection.
14. Aluminum foil – heavy duty. For cooking over a fire, use the heavy-duty. Store brands are less expensive and work fine. Do get the heavy-duty. Thin foil just can’t take the heat.
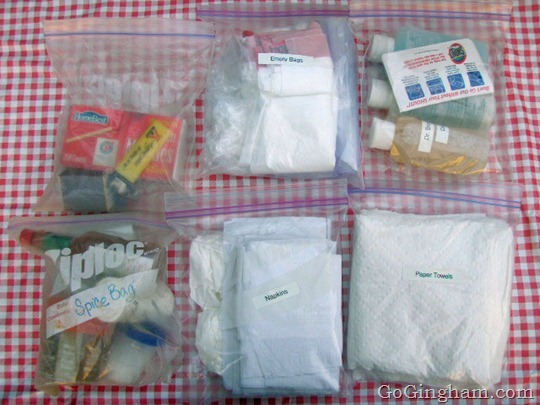
15. Matches, various sizes of empty plastic bags, soap (for camping, I like Dr. Bronner’s brand) , spices, napkins, and paper towels. Labeled and kept refilled, you’ll always be prepared.
16. Glass jar (it’s a coffee drink jar saved from recycling) for fresh flowers and candles. Really, why not live beautifully at the campsite?
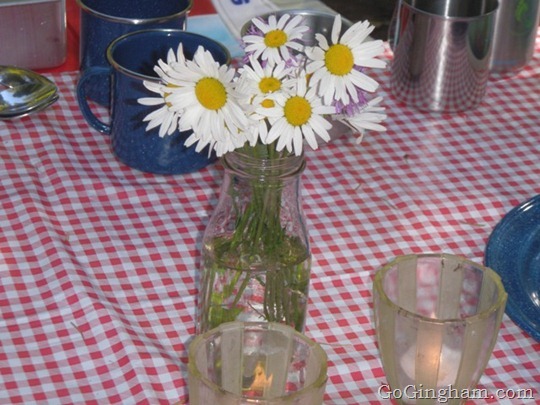
17. Gingham tablecloth. You knew I’d have a gingham tablecloth, right? This one is plastic. Wiped down after a meal it’s ready to go again. Ours is melted in several spots. Be careful with the camp stove and plastic tablecloths.
18. Camp Cooking Supply Container. And everything fits into one of these.
Stocked and ready to go camping. Re-stock as soon as you return from a trip and you won’t find yourself missing anything on your next camping adventure. I also like to run items through the dishwasher when we get home. If nothing else, it eliminates that lingering campfire smell.
Here is a segment from Fusion NW, a local TV program that filmed a segment about our Camp Cooking Supply Container and all its contents.
Do you camp? Do you want to give camping a try? Where’s your favorite camping spot?
Go Gingham related links:
Meal planning for campers can be found here
Frugal family summer fun activities can be found here
Want to keep your food costs low while traveling? Try these tips!
Headed to the Pacific Northwest? You’ll want to hit these spots.
Sara, this post rocks! It really made me think about all of the stuff we take camping. We like to go to the unregulated spots in the national forests because we like having more space, less noise and our dog can run more.
We sometimes do all of our cooking on the fire and sometimes use a campstove. When cooking on the open fire we found that having a lightweight portable grate is really handy. You can find these used when people are throwing out their old grills. Also, a cast iron skillet. A good backpacking/hunting knife is also essential as it can be used for many purposes. Otherwise our list is similar to yours but with less gingham. We’ll work on that!
Joe
LikeLike
Hey, Joe, thanks! I really like the idea of the portable grate. The fire pits we usually encounter (in most National Forest Parks) have such huge grates, you really have to watch your food so it doesn’t fall through any cracks. Yes, please, work on adding more gingham to your camping mix. You won’t be sorry!
LikeLike
Love this! Will study it more closely as the time nears for Nehalem Bay State Park. But one thing- When it comes to coffee, FRENCH PRESS all the way, baby! And to keep it hot, pour it into a thermos right away.
LikeLike
Good tip on the thermos! I’ll keep my fingers crossed that you have sunny weather at Nehalem Bay. We just returned from very cold and a bit rainy camping on Mt. Hood. Had fun but everything was WET!
Thanks for the comment, Sue.
LikeLike
Hi Sara, we are old time camping pros.
I have the same thing in
place with our camping gear. Thought I would pass on an old time recipe to take camping that is easy and quick and delicious and you cook it over the open fire. Hobo dinners. With these you can really get creative. First you tear off a good size piece of tin foil and place any option of meat (beef patty, boneless skinless chicken breast, or vegan options (my daughters favorite Trader Joes Italian sausage) place it in center. Add any combination of vegies (sliced potatos, zucchini,onions,carrots,etc) I like to use what is fresh from my garden. Add a couple of slices of butter 2 to 3 tbl. or keep it vegan with earth balance. Add any kind of herb or spice you prefer. I like to add some chopped garlic, salt and pepper, basil. When your finished wrap it up and wrap it again in 2 to 3 more layers of tin foil. I like to make these the night before we leave, keep them refrigerated. In the morning before you head out put them in a large plastic bag, place in cooler with the ice on top of them. This way when you get to camp you can set up camp and relax. Your dinner is all prepared. Start the campfire open the wine and break out the hobo dinners. Place hobo dinners on top of grate and cook approx 7 mins each side (needed are two long very large sticks to turn these over) pull one off to check if they are done. You may want to place them on those plates as the do make a black mess on table cloths. I love to serve them with salad and bread. Enjoy, Tina Test
LikeLike
My camping box is pretty similar to yours. I also have a portable burner, that screws on the top of a little canister of propane. If you’re only doing a weekend, it’s all you really need. And we frequently use kitty litter buckets, well-cleaned, to stash stuff and then to use as washing and rinsing buckets. The lids keep the water clean so you can use breakfast soapy water to clean up after lunch. And we always have a small bottle of bleach, to avoid intestinal upsets, and use a tiny bit in the wash water. Call me paranoid, but none of my crew has ever been sick!
Your dandy little flatware container with the sliding lid is a pullman loaf pan for baking sandwich bread. The lid keeps the dough from rising above the pan, and bakes a nice dense loaf, perfect for sandwiches. They also come in pretty shapes, with caps on the ends instead of the classic loaf shape. I envy you yours!
Thanks for sharing! I love your blog!
LikeLike
Agree with using washable dishes. I always thought it was fun washing them in a primitive way. 🙂
LikeLike