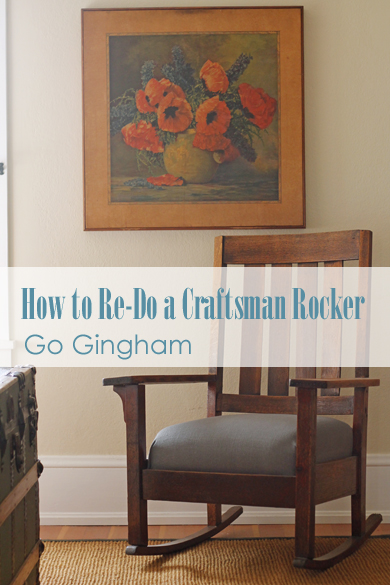
You know I love chairs, right? If you don’t know that about me, read up. After getting rid of a lot of chairs, I had to keep this one. It was a steal at a garage sale and since I live in a Craftsman style bungalow, I needed this Craftsman style rocker to go with it, right? Of course.
The style, the simplicity, the design, the price – they were all right up my alley.

It was in good shape but rickety. After sitting in the garage for a spell (to make sure no critters were living inside – remember the rats?), every joint needed re-gluing.

There were lots of old staples and tacks that needed pulling out.

The cushion had springs, and aside from covers being torn, looked like it was still in good condition.
 After getting nails, tacks, and staples out, the chair was ready for a little bit of sanding – but not too much. I was trying not to remove too much of the old finish.
I used a mixture of half tung oil and half turpentine, with very fine steel, wool on the wood. I brushed this on and let it sit for 20 minutes or so. This mixture works well to take the old finish off, and put a new one on, in one step. The wood was super dry, so it soaked in really quickly.

The steel wool gets into the wood grain and gets the specks of paint and other debris out.

I did do extra coats on the arms of the chair. Those needed to be smooth.

Next, the Craftsman style rocker went up to our bedroom and sat like this for hours, days, weeks, months, a year could have been more than a year until we finally got around to finishing the cushion part. The chair was really good at holding up clothing for a while.

Now, onto to the cushion….First up, I lined the floor with an old shower curtain. Yes, I hold onto those for projects. It protects everything and makes clean up super easy.

Very few tools were needed because the covers just came right off. Pulling out tacks and old staples took the longest. Vice grips and a small pincer tool work best for those.

It wasn’t pretty inside but the foam rubber cushion cover (over the coil frame) was in good enough shape to reuse.

Foam rubber is expensive so if it can be reused, I reuse it. When it’s getting wrapped in batting and quilt lining, no one will be able to tell if it’s the original.

That’s what I got rid of, and luckily – no signs of bugs or rats. You know I don’t like those.

The front of the chair needed some extra cushioning to cover the springs so I added some scrap foam rubber that I had from another project. Next, I covered the whole thing with more batting.

Then I pushed more foam rubber into the gap. I tried the cover fabric over the seat and it left a gap so I jammed more in there. There is nothing scientific or measured – just do what looks nice.
After I staple gunned the cover fabric onto the frame, I added a piece of scrap fabric to the bottom to cover the coils. This wasn’t necessary because no one will see it but this is what professionals do. Also, it’s gingham and everything needs a little bit of gingham!! I sewed the ends by hand but made sure that none of this stitching would show once the seat went back into the chair. It’s not pretty but it got the job done.

And, now the seat was ready for its new home. Into the rocker it went. And…

Finally done! I love how it turned out and it fits in our bedroom – along with the free dresser we found. I like bedrooms to have rocking chairs. Rocking is very calming.

When it’s not covered in clothes, this Craftsman style rocker looks pretty good in here.
What’s your favorite type of furniture? Do you like rocking chairs?
Go Gingham related links:
My chair sale was a hit – read about it here
Some may call it a ‘chair obsession’ – like my husband!
How to re-do outdoor chairs – easy and best if they’re free
Fixing a chair leg – it’s a cautionary tale – don’t miss it!

wow, looks so good! I don’t have the patience to do this type of project. It looks wonderful though.
I love your blog…
LikeLike
Thanks, Bobbi! I don’t always have the patience for all of my projects either – 😉 hence the huge chair sale I had! Mostly, I’m pickier now and won’t take on an item unless I absolutely love it. I’ve got two little stadium seats that are needed for Friday night so I’m thinking about tackling them today. We’ll see…thanks for your kind words, too!
LikeLike
Well done, Sara! It looks fantastic, and I have to say I love the part where you cross off all the time it sat in your room, waiting 🙂
I’ve always let the fear of bugs prevent me from doing projects like these, plus there’s the additional problem of my perfectionism, which is probably Enemy Number One of DIY upholstering!
LikeLike
Marian, the critter issue really creeps me out, too, but that’s why I leave stuff in the garage or outside or wash it immediately when I acquire a new item. I hear ya’ on the perfectionism and all I can say is practice. Start on a chair that you don’t ‘love’ and then see how you do. All of my sewing and upholstering projects have seams in the back or underneath (hidden) so that you can’t see how it’s sewn or didn’t line up. No one notices these things except the person who did the work 🙂 Try it!!
LikeLike
When it’s not covered with clothes….lol! You are funny. And I thought I was the only one…..this turned out beautiful. I don’t think I can recreate something like this….but who knows. Maybe one day I will find a project that will otivate me to undertake this project. The chair turned out professional for sure.
LikeLike
Thanks so much, Minnie! I can tell you that the chair collects clothes and dust more than anything! 🙂 I love to have a project and enjoy working on something so this a good outlet for me.
Thanks for writing in…
LikeLike
I also have a bedroom chair that needs to be re-done whose primary purpose is to hold clothes … it’s not a rocker, though, and will require a professional upholsterer, as it has a tufted back. I tucked cut-up dropcloth fabric on the back and the seat to neaten it up a bit. Your rocker is pretty–I think Craftsman style is timeless.
LikeLike
Kris, I’ve done that very thing – “tucked cut-up dropcloth fabric on the back and the seat to neaten it up a bit” and that’s an excellent solution – since we both have done it 😉 The tufted back chair intimidates me. I’ve not dragged one home to tackle myself but I have made a cushion with covered buttons and made my own version – with very few buttons of course!
Thanks for writing in, Kris.
LikeLike
This chair was inherited from my husband’s family. I don’t think I would voluntarily pick up a tufted-back chair, either, but the chair does have possibilities. It’s a nice size for tucking into a corner and with neutral uphostery, could go just about anywhere.
You know, I have checked out a lot of diy chair/upholstery refinishing online, and I’m not sure that I’m intimidated as much as just not motivated to take on such a time-consuming project. I admire people like you who do so, but I’m not one of them …
LikeLike
I’ve given up on chairs in the bedroom. They do look to be so soothing in someone else’s house, but in mine they just collect junk. There are some college habits one never outgrows, I guess, and one of mine would be piling everything on the chair in the bedroom!
LikeLike